Video security system – complete and operational

The video security system is now a “fully armed and operational battlestation.”

I installed the replacement camera in it’s final position on the west exterior wall, aimed it, and connected it to ZM.  My initial aiming of the camera was close enough to the correct position that I decided to leave it alone.

The camera is working properly with ambient light and with IR lighting.  I set up a detection zone and a preclusive zone to try and prevent false positives, but I had to move the preclusive zone around a bit to achieve the desired effect.  There may be more tweaks in the future, but for now it appears to be working well.

So the system is complete and is working very well.  I’ve defined several run states, which controls the camera modes (monitor, motion detection, or disabled) by simply changing the run state.  You can easily change the run state from the web UI, a cron entry, or from the zmNinja phone app.  Very convenient, and much simpler than changing the mode for every camera in the system manually.

I didn’t spend a lot of cash for this system, but I did invest time in configuring ZM to do what I wanted, and to install the cameras and wire them to the POE switch.  Coding a script to copy event files to Google Drive was a bit of a challenge, and it’s working.  The system is secure, and the cameras are not accessible from outside my network.

An interesting journey from zero experience to a fully functional video security system.  Lots of people that I don’t know and will probably never meet shared their experience and knowledge on multiple forums, and ultimately helped me to get this system working.

My sincere thanks to the ZoneMinder authors and contributors, and to the people that post both questions and answers on the forums.  I learned a lot.

Video security system – firing on all cylinders

I received the replacement camera from Amcrest, fairly promptly if I’m honest about it.  I plugged it into the POE switch with a patch cable, and configured the network settings, including dedicated IP address, netmask, gateway IP address which you will recall is a valid IP address but not a gateway.  I configured the video feed parameters and turned off the overlays.

I went to the ZM console and activated the camera in monitor mode.  The camera worked fine and provided a good image with ambient light.  That night, I had a good image as well, with the IR emitters on the camera providing the lighting.  Success!

I ordered the exterior mount I need for this camera, and it arrived a few days later.  I’ll get the camera installed on the exterior wall, aimed, and then I’ll set up the detection zones.  I’ll use a preclusive zone to try and prevent a false positive when the camera switches to and from IR lighting, just like I did with the other exterior camera.

Then I will have a fully functional system, with two exterior cameras and two interior cameras, all with motion detection zones defined for the areas where there should not be motion – or to put it differently, areas where motion is something I want to know about.

The zmNinja phone app works very well, and I did some additional setup on the ZM console to make it easier to use.  You can configure the system as you want it to work when you’re away from the house, and you can save this run state as “Away”.  On the zmNinja phone app, you can change the run state to away with a couple of clicks (touches?) and all cameras will switch to modect.  I also set all cameras to monitor mode, and saved that run state as “Home”.  So when I pull in the driveway, before I get in range of the cameras, I can change the run state to “Home” and I won’t have to clear out a bunch of alerts from me driving up to the house.  Very useful and simple to manage.

I will also set up an additional run state that I will name “Night”.  In this run state, both exterior cameras and the downstairs camera will be in modect mode, while the upstairs camera will be in monitor mode.  I don’t need an alert when I turn on a bedroom or bathroom light during the night.  I also set up a “Privacy” run state, where the interior cameras are disabled, but the exterior cameras are in modect mode.

it’s a good system, with alert files uploaded to google drive as soon as they’re recorded, emails are sent for alerts with at least 10 frames of motion, just about full control with the zmNinja phone app, and UPS battery backup for the ONT, router, and camera power.  There is a 5 port switch upstairs so that the computer running ZM has a wired connection.  The upstairs switch is on another UPS, so it will continue to run even if the mains power fails.  The laptop running ZM has an internal battery so it doesn’t need to be on the UPS.

Pretty sophisticated security for a cabin in the sticks, and without spending a lot of cash to get there.  It took some thought and work to get the system where it is now, but hopefully documenting the process will help others figure out what they need and how to get it in place.

Happy video security to you!

Video security system – a problem resolved, but tweaks needed

Remember the upstairs camera that did not provide a good image after dark?  My initial suspicion was that the IR emitters had failed, but that turned out not to be the case.  The IR emitters were working fine, the problem is that the camera did not respond to IR lighting.  The net effect is the same, an almost completely dark image that is useless for detecting motion.  I swapped in another camera, and the upstairs video after dark is now good and the camera is behaving properly.  One problem resolved.  The old camera goes back for a warranty replacement.

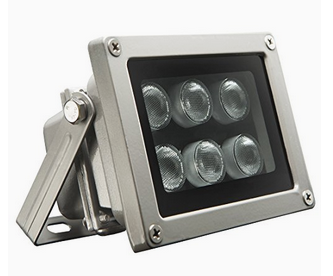
I installed an outdoor camera to monitor the driveway and the area in front of the garage door.  I think some supplemental IR lighting will be needed to have this camera work as well as I’d like, so I’ve ordered an IR floodlight and a power supply for it.  On my next trip up to the cabin I’ll play around with the IR floodlight and placement to see if I can improve the video image from the outdoor camera.  I’m hopeful that this supplemental lighting will also help with the yet-to-be installed camera on the west side of the cabin.

As expected, l ran into a little problem with the outdoor camera.  At dusk, the camera switches from daylight mode to IR, and in that transition period almost all of the pixels in the image change.  This large change triggers an alarm event.  Again, when the camera switches from IR mode to daylight, the changeover triggers yet another alarm event.

I didn’t want to reduce the sensitivity of the active zone, as that could prevent valid motion from triggering an alarm.  To resolve this, I created a small “preclusive” zone within the active motion detection zone.  It’s located up on the side of the building, where motion is unlikely.  The function of this zone is to prevent an alarm event when this zone changes.  Since preclusive zones are processed before active zones, this will stop alarm events during changes to and from IR and daylight modes.

I’ll continue to monitor the system and be sure that this zone is having the desired effect.  Since I can’t control the sunlight, I’ll just have to be patient and let nature proceed in it’s own way and on it’s own schedule while I test this change.

When I get the replacement camera back, I’ll get it installed and then my system will be complete.  So far, it’s working very well.  Not bad for someone who had zero experience with video security prior to this project.  I’ve learned a lot along the way and hopefully my experiences will help you.

Video security system – a problem

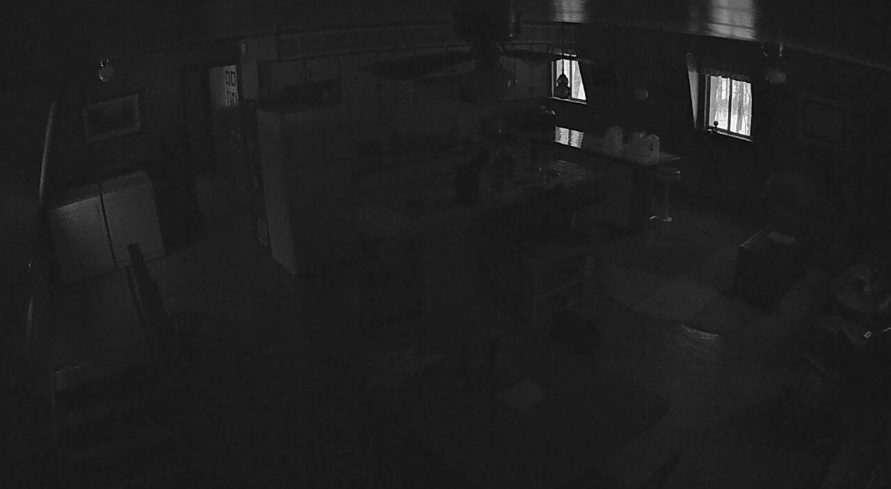
I’ve installed the two indoor cameras, and unfortunately there’s a problem with the upstairs camera.  This is what the image looks like right before it goes completely black.  The IR emitters aren’t working.  So at night, the image is completely black.  Not terribly useful.

I used the reset link on the camera’s web page, but that’s a software reset, not a hardware reset.  I’m sorry to say that didn’t resolve the problem.

I contacted Amcrest, and explained my problem.  The response suggested that I would need to do a hardware reset, since the software reset didn’t help.  To do that you need to disassemble the camera so that you can access the motherboard, and press a switch on the motherboard.  That will reset the login password, IP address, and video stream configuration.  A nuisance for sure, but maybe it will resolve the problem.  Honestly, I have my doubts – and can I trust a camera that required a hardware reset to restore proper functionality?  When will the next hardware reset be required – a week or a month later?  I had him send me an email with the hardware reset instructions – disassembling the camera voids the warranty, so I wanted some way to demonstrate that I took it apart at their direction should there be a future problem with it.

I’m 5 hours away from the cabin, so I don’t just run up there to try every resolution immediately.  I’ll try the hardware reset on my next trip.  If it works, great – but as I said earlier – it will still be suspect.  If not, I have a plan B.

I’ll connect both uninstalled cameras to the POE switch with patch cables and make sure that they work properly and that the IR emitters are behaving.  I hope that both remaining cameras work properly and I’ll pick one and replace the upstairs camera with it.  I’ll need to reset the IP address, which is easy enough, and verify the video stream parameters as well.  Then I’ll have both indoor cameras working properly, and I can install the remaining good camera in it’s place on the roof soffit.  The bad one will be sent back for a replacement under warranty.  It’s not a difficult install, mounting the camera is pretty easy.  Running the cat6 cable is a little more involved but again not too bad.  Since I borrowed a cable tester from a friend (thanks Bob) I can make sure that the cable connectors are properly crimped on and that the cable is good.  Then I plug it into the POE switch and set it up in ZM.

I’ll leave this camera in Monitor mode for now, since it’s an outdoor camera I’ll need to set up detection zones and ignore zones to try and minimize false positives.  I don’t expect this will be a set-it-and-forget-it process, I think I’ll spend some time tweaking this before it’s reliable.

I’m curious what will show up when I change the mode to Modect and start recording events.

Video security system – putting it all together

We should now have camera(s), with a dedicated IP address and a gateway IP address that isn’t actually a gateway, and an updated username/password.  The camera(s) should be connected using an ethernet cable to a POE switch, and the POE switch is connected to our router.  The computer that will run Zoneminder is connected to the router using an ethernet cable.

The ZM documentation is very good and will help you to optimize the settings for your particular camera(s) and computer system resources.  Follow the platform-specific installation steps in the User Guide to complete the initial installation.

Now let’s bring it all together.  It’s best to start with a lower resolution and frame rate as it’s less taxing to the computer running Zoneminder.  We can tweak the resolution and frame rates after we see how the system is performing.  Be aware that the number of camera(s), the size of the detection zones, and the method of detection will affect the required system resources.  Initially, we’ll use the “Monitor” configuration – this does not record video, it just allows Zoneminder to access the video streams.  We’ll enable motion detection at a later time.

I’m going to be a little vague about the exact ZM setup, as the cameras you choose and the system that runs ZM will dictate a lot of the settings you use.  The information you find in the ZM documentation and the ZM forums comes from people with a lot of knowledge and experience, and the forums are particularly helpful when you’re just getting the system up and running.

First, we need to get the cameras talking to ZM.  On the Console page, we want to add a monitor.  On the general page, you should give the monitor (camera) a name, and it is helpful for the name to be the location of the camera – something like “front door”, “garage”, “living room”, “patio door”, etc.  The Source page is most easily populated by clicking ONVIF and letting ZM locate the ONVIF devices on the network.  Select the one you want to use as monitor #1 – remember that we wrote down the IP addresses for the cameras as we set up the network information.  You’ll need to set up the framerate and the resolution for the video stream to match the camera settings, so that ZM knows what to expect.  Once this is done, the ZM console should report that the cameras is “Capturing”.    Then by clicking on the camera’s name, you should see the video stream for that camera.

Then you simply add a monitor for each camera on your network.  You can see them all at once on the Montage page.

Video security system – Connections, part 2

A quick review – your router is assigning IP addresses using the range 192.168.1.100 through 192.168..1.199.  We’re going to use IP addresses that are not in that range.

Let’s say we want to use 192.168.1.51 for the first camera, and the router says that one of the cameras (it doesn’t really matter which one) is using 192.168.1.183.  In a browser address bar, type http://192.168.1.183 and press enter.  You should see a login page for your camera.  Usually the username is “admin” and the default password is usually “admin”.  The documentation that came with your camera should tell you the login default values.  Go ahead and log in.

Now we want to access the network settings, specifically the TCP/IP data.  We want to use a dedicated IP address, and we will set it to  192.168.1.51.  The netmask value should be 255.255.255.0, and you can set the DNS value to 8.8.8.8 (that’s google’s dns servers).  Next is the single most important change you will make.  We want to set the gateway IP address to a value that cannot act as a gateway to the public internet.  Usually the gateway address is the router’s IP address, something like 192.168.1.1, or maybe 192.168.1.254.  Let’s use 192.168.1.50.  That is not a valid gateway but it is a valid IP address.

Why do we want use an IP address as a gateway when it isn’t a gateway?  So that the cameras cannot communicate with the public internet, only with your local network.

I cannot over-emphasize the importance of this last step.  Failing to do this will leave the door open to a hacker gaining access to your video streams.  You do not want that to happen.

Now on the configuration page, change the camera password.  Do not leave it at “admin”.  Save your changes.  You’ll lose the connection to the camera, but that’s because you changed the IP address.  Go to http://192.168.1.51 and it should be patiently waiting for you there.  Log in using the updated password to make sure it works.  Also, as a double-check, try logging in using the default password of “admin”.  It should NOT work.

If you’ve connected multiple cameras, go through the same process with each one in turn.  The next camera will use 192.168.1.52, then .53, and so on.  Write down the IP addresses you use, and the passwords for each one.  It will make things simpler if you use the same password for all of the cameras.

When you’ve finished this, you’ll have cameras connected to your network, updated passwords, and dedicated IP addresses for each one.  The cameras will not have access to the public internet, only to your local network.

Video security project – Connections

We have a computer package to run the system, and we have cameras to supply the system with video and still images.  We will use an ethernet cable to connect to the cameras, and also to supply power to them.  What else do we need?

We need a special type of switch to obtain the data connection to the cameras and to supply power to them.  Regular switches just handle the data connection, so we’ll need a POE switch.  You can find them in various configurations, the one I chose was an 8 port model.  4 of the ports will go to the cameras, and a fifth will connect to the router.  The last connection (to the router) will allow computers on our network to access the video data.  We’ll talk about security for the video streams a bit later.

I would recommend a wired connection for the computer that will be running the system.  Wired connections are much more difficult to break into than wifi-based communication, and video streams from your home should be as private as you can possibly make them.

A bit about cameras setup with an eye towards security for your video streams.  With most IP-based cameras, once you’ve connected them to a POE switch and connected that switch to your network, the streams are available to any device on your network, AND POSSIBLY TO THE INTERNET AS WELL.  We need to fix that right now.

You can scan your network looking for the cameras using nmap, but if you’re not THAT deep into network security, your router probably has a page that displays the devices connected to your network, both wired and via wireless connections.  Just note the IP addresses that were assigned to the cameras you’ve connected – we’ll need them when we tighten up the security.

Before we continue, a bit of background.  Usually, when your router is configured you choose a range of IP addresses that can be assigned to devices – like phones, laptops connected via wifi, tablets, etc.  Looking at your router’s wireless page should tell you the range of IP addresses that are used.  I prefer to assign a dedicated IP address to each camera, and the most reliable way to do that is to select addresses that are not used for other devices.  Let’s say that your router uses IP addresses from 192.168.1.100 through 192.168..1.199 for devices that connect to your network.  We’re going to assign IP addresses for the cameras using IP addresses that are not in that range.

This getting a little long, but this is a very important discussion, so lets continue this on the next post.

Video security project – Cameras

We need cameras to provide us with video.  There are a bewildering number of video security cameras available, some really cheap ones (don’t bother), mid-range cameras with fair resolution, higher-end cameras with very good resolution, and top-shelf cameras that have PTZ features (Pan, Tilt, and Zoom).

A primary requirement for me was that the cameras have IR (infrared) emitters so that they can provide a useful image in the dark.  If your cameras don’t have IR capabilities, you’ll need to provide lighting so the camera can “see”.  Not an attractive option.

So far, we want very good resolution images and video, and we want IR emitters so the camera can provide images and video without ambient light.  There are other decision to make as well.

There are may styles of cameras – bullet cameras, dome cameras, eyeball cameras, etc.  I chose eyeball cameras.  They provide good wide-angle images, and are not affected by ambient light reflecting from the dome enclosure.  Bullet cameras don’t typically have the same wide angle viewing as dome and eyeball cameras, so they are better suited to monitoring a specific location, such as a door or sidewalk.

Now we need to consider how we will connect these cameras to the software.  There are cameras that communicate over wifi – they are easy to install because you don’t need to wire them into your network, but they might require a wired power connection.  Battery-powered units (even those with a small solar panel) are frankly just more trouble than they’re worth.  The other main type of camera is wired using an ethernet cable, sometimes called cat5 or cat6.  There are other designations also.  Some of these require separate power connection, but there is a sub-type of wired cameras – those that connect to a POE switch.  POE is Power Over Ethernet, which allows the same cable that handles the video stream to supply power to the camera.  This is probably the best way to connect a robust video surveillance system.

I chose an eyeball camera with very good video and still image resolution, and a POE connection for both power and data.  Now that we’ve made that choice, let’s look at how we might put this together.

Video security project – I want one

I’ve been intending to install a video security system at my cabin for some time now.  But making that a reality has been a more difficult journey than I initially expected.  Sure, the easy way is to hire someone to do all of the work and install a system, but I’m a DIY-type and this is not beyond my capabilities.

I did not want to sign up for a “security system in the cloud” because I don’t want my information available to anyone but me.  Maybe I’m a little paranoid about that – but to quote Dr. Johnny Fever from WKRP – “When everyone is after you, paranoid is just good thinking.”

So I decided to do this myself.  I have a lot of IT experience with networking, server security, and programming – but not any experience with video security.  So I started looking around at software to run the system, and found a package called Zoneminder.  The name comes from one of the project’s biggest features – that you can define zones where any detected motion will trigger an alarm.  Where smaller (read less flexible) systems trigger an alarm on any motion within the camera’s view, you can define multiple zones where motion should trigger an alarm, and also zones where motion is to be ignored.

The last statement may not make a lot of sense to some folks – but think of an outdoor camera monitoring the front door in a wooded yard.  Trees have leaves, and they move when it’s windy.  To a computer program, that’s motion.  The fact that it isn’t human or animal motion is an unimportant distinction.

You can also define what amount of movement is considered important enough to trigger an alarm.  Whether that is by the number of image pixels that change, or how many pixels change compared to the total number of pixels in the image – you have a great deal of control over these behaviors.

We’re going to need some cameras, a computer to run the system, software (which I already chose), and some way to connect everything together.