A Raspberry Pi project

I had not played around with a Raspberry Pi SBC (single board computer) before now, and I’m not really sure why not. Maybe because I have enough computers around the house, but I suspect the real reason is that I just didn’t have a viable use for it. I came up with one, and decided to jump in.

I picked up a Raspberry Pi 4B with 4gb ram from Canakit. It came with a power supply, a 32gb micro-sd card containing NOOBS (New Out Of Box Software), and the raspberry pi itself. Connecting an HDMI monitor and keyboard/mouse was trivial. Inserted the micro-sd card, and powered it up. A few minutes later I had a running computer. I updated the software, which was easy using the available tools from the OS. Not blazingly fast by any measure, but usable. Now toy day is always a good day.

I decided that I wanted a case for it, so I did some digging around and chose the Argon One case. The plus for this case is that the connections are routed out the back of the case, and it has a programmable power switch. There is a very nice program that uses an overlay to manage the fan and the power switch. A long press of the power switch shuts the pi down; a double-press reboots the pi, and a single press will start it if the power is off. You can set the temperature thresholds and desired fan speeds, and the settings survive a reboot.

I decided to use an SSD instead of the micro-sd card to hold the OS and also wanted to boot the pi with this configuration. The micro-sd card would not be needed once this is configured. I picked up this SSD and this adapter to connect it to one of the USB3 ports. Worked great. Except for the small hiccup – you can copy the running OS to the SSD, but you can’t boot an SSD from the NOOBS version of Raspbian. So I downloaded an ISO of the Raspbian OS, loaded it onto the micro-sd card, and powered up the pi. I had to reconfigure everything that I had just finished configuring, but since that was recently done it went fairly quickly.

Copying the OS to the SSD was simple using the “SD Card Copier” utility from the “Accessories” menu, and we were at the precipice. Powered down the pi, removed the micro-sd, and powered up the pi. It booted just fine, and I was now running the pi with a 500gb SSD. Not really a major accomplishment, but a big step forward in performance and reliability.

Now we have a Raspberry Pi in a well-designed case, using a 500gb SSD for storage, and a daemon that manages temperature, fan speed, and the multiple functions of the power button.  A very good start.

Video security project – Cameras

We need cameras to provide us with video.  There are a bewildering number of video security cameras available, some really cheap ones (don’t bother), mid-range cameras with fair resolution, higher-end cameras with very good resolution, and top-shelf cameras that have PTZ features (Pan, Tilt, and Zoom).

A primary requirement for me was that the cameras have IR (infrared) emitters so that they can provide a useful image in the dark.  If your cameras don’t have IR capabilities, you’ll need to provide lighting so the camera can “see”.  Not an attractive option.

So far, we want very good resolution images and video, and we want IR emitters so the camera can provide images and video without ambient light.  There are other decision to make as well.

There are may styles of cameras – bullet cameras, dome cameras, eyeball cameras, etc.  I chose eyeball cameras.  They provide good wide-angle images, and are not affected by ambient light reflecting from the dome enclosure.  Bullet cameras don’t typically have the same wide angle viewing as dome and eyeball cameras, so they are better suited to monitoring a specific location, such as a door or sidewalk.

Now we need to consider how we will connect these cameras to the software.  There are cameras that communicate over wifi – they are easy to install because you don’t need to wire them into your network, but they might require a wired power connection.  Battery-powered units (even those with a small solar panel) are frankly just more trouble than they’re worth.  The other main type of camera is wired using an ethernet cable, sometimes called cat5 or cat6.  There are other designations also.  Some of these require separate power connection, but there is a sub-type of wired cameras – those that connect to a POE switch.  POE is Power Over Ethernet, which allows the same cable that handles the video stream to supply power to the camera.  This is probably the best way to connect a robust video surveillance system.

I chose an eyeball camera with very good video and still image resolution, and a POE connection for both power and data.  Now that we’ve made that choice, let’s look at how we might put this together.

Video security project – I want one

I’ve been intending to install a video security system at my cabin for some time now.  But making that a reality has been a more difficult journey than I initially expected.  Sure, the easy way is to hire someone to do all of the work and install a system, but I’m a DIY-type and this is not beyond my capabilities.

I did not want to sign up for a “security system in the cloud” because I don’t want my information available to anyone but me.  Maybe I’m a little paranoid about that – but to quote Dr. Johnny Fever from WKRP – “When everyone is after you, paranoid is just good thinking.”

So I decided to do this myself.  I have a lot of IT experience with networking, server security, and programming – but not any experience with video security.  So I started looking around at software to run the system, and found a package called Zoneminder.  The name comes from one of the project’s biggest features – that you can define zones where any detected motion will trigger an alarm.  Where smaller (read less flexible) systems trigger an alarm on any motion within the camera’s view, you can define multiple zones where motion should trigger an alarm, and also zones where motion is to be ignored.

The last statement may not make a lot of sense to some folks – but think of an outdoor camera monitoring the front door in a wooded yard.  Trees have leaves, and they move when it’s windy.  To a computer program, that’s motion.  The fact that it isn’t human or animal motion is an unimportant distinction.

You can also define what amount of movement is considered important enough to trigger an alarm.  Whether that is by the number of image pixels that change, or how many pixels change compared to the total number of pixels in the image – you have a great deal of control over these behaviors.

We’re going to need some cameras, a computer to run the system, software (which I already chose), and some way to connect everything together.

3rd Annual Bourbon and Tobacco Tour – a great weekend of riding

The 3rd annual Bourbon and Tobacco Tour was held on September 12th and 13th, with the road and trail routes both in Land Between the Lakes (LBL).  The weather was good on Saturday morning, but the afternoon proved to be a wet one.

We were fortunate that a friend and local cycling buddy volunteered to be our SAG driver for the road ride.  Many thanks to Greg for his time and effort on our behalf.  Having a SAG driver was a first and a luxury for our little ride.

We rolled out from the Golden Pond visitor center just after 10am with 5 riders – myself, Doug from Madisonville,  KY, Nic from Springfield, IL, Mike from Louisville, KY, and Bob from Memphis, TN.  The temps were in the 70s, and the humidity was up.  The clouds parted once we were on the course, and we had sunshine for probably half to three quarters of the ride.

We headed north on the Trace road, no steep climbs but longer shallower climbs than we would see later.  We were pretty much together as we reached Silver Trail road where we turned east off the Trace road.  Silver Trace is a really nice section, maybe 3-4 miles long, running through the LBL forest.  At the Nature Center, we turned south and immediately passed an old iron ore furnace from the mid-1800s.  After this point the hills start to show up pretty quickly.  Up and down some nice rollers, and we cross the Energy Lake dam.  From this point south to 68, the hills start to bite.  Some steep climbs at up to 14% but most not quite that steep tested the legs.  This was the hardest section of the north loop.  We regrouped at the parking lot on the north side of 68, the hard climbing done for the north loop.  We headed west on 68 to the turnoff for Wrangler’s Camp, and headed south away from 68.  Some easy rollers and we turned right to head back to the Trace road.  A few more rollers on this section, and we came out on the Trace road about a half mile south of the visitor center.  Just a few minutes later we were back to the start point.

The plan was to re-hydrate, re-fuel, and head out for the south loop.  But we heard some sounds that were suspiciously thunder-like.  It could have been trucks on 68, but sadly it wasn’t.  Checking the radar, there were storms coming in from the west, and a large blob of rain following them.  We decided to pack up and head into town to get takeout for a late lunch at the park in Cadiz.  I went home and changed clothes, got lunch and met the others at the park.  It was nice to sit around and talk while we were rained on.

We decided to meet on Sunday for the trail ride, and we talked our SAG driver, Greg, into riding with us.  It was very generous of him to follow us around LBL and to help with drinks and snacks as we rode.  Quite a luxury.

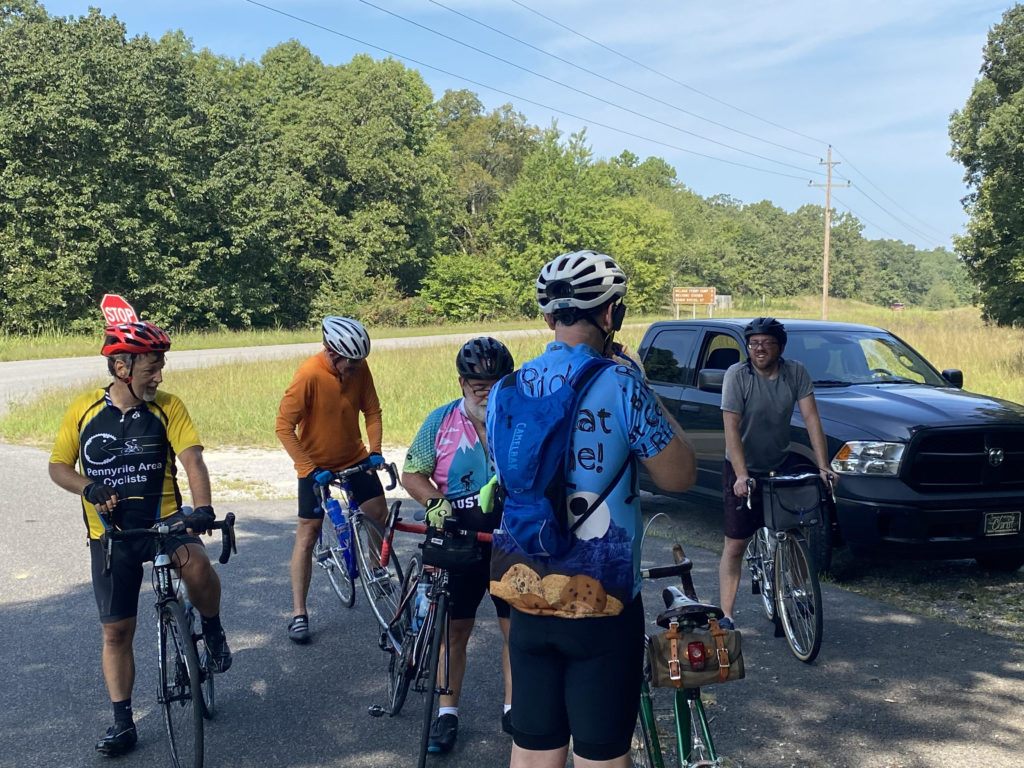
We met Sunday morning at the Wrangler’s Camp turnoff on 68, and we took Greg’s truck up to the Golden Pond visitor center and left it there with drink and snacks in it.  We rolled out at roughly 10am.  Doug, Greg, and myself were the only victims today.  The Hardwoods Trail is in very good shape and we had a good climb up to the visitor center.  A bottle of water and some fig newtons and we continued west towards Kentucky Lake.  This section is mostly descending, going down English Hill, which we will have to climb very soon.  We stopped at the Fenton picnic area and shot the breeze for a little while.  Then we headed out to climb English Hill on our way back to the visitor center.  Greg decided that he would take his truck from there, and meet us back at the Wrangler’s Camp turnoff.  Doug and I continued east and met Greg there.  A good trail ride, good company, and cooperative weather made for a really good day out on the bikes.

That’s the 3rd annual Bourbon and Tobacco tour post-mortem.  We’ll be back for the 4th annual ride in 2021, hopefully in mid-April depending on circumstances.  Best wishes for safe riding in 2020, and for a better year next year for everyone.

2020 Trek Challenge – 617 miles, 25,123 feet of climbing

I decided to enter the Trek Challenge.  You join the challenge, and ride 100, 500, or 1000 miles during the month of July.  To document the miles, you upload a gps file of your ride data to strava.com.  July in Kentucky isn’t always the best cycling weather, with heat, humidity, wind, storms, and rain – but you fit rides in where you can and make the most of it.

I started pretty strong, with 3 good rides on the 2nd through the 4th.  I knew that heat and wet weather might make the miles difficult to come by later in the month, so I wanted to get as many miles logged in the early part of the month as I could.

July 1 through July 7, I rode 157.1 miles. a really good start.

July 8 through July 14, I rode 131.5 miles, for a total of 288.6 miles.

July 15 through July 21, I rode 160.4 miles, for a total of 449 miles.  The goal is in sight.

July 22 through July 28, I rode 105.6 miles, for a total of 554.6.  The 500th mile was on a ride with Mike and Carrie, on a 42 mile route south of Hopkinsville.

But I wasn’t done, there were more riding days in July.  July 29th I got in 26 miles at the shop ride, and then the next day I rode 36.8 miles in the Land Between the Lakes.  I got rained on the last 10 miles or so in LBL, but it didn’t matter.  Those last two rides for July put me at 617 miles and 25,123 feet of climbing.

It was hot and humid in July, so you mostly ride early in the day to try and avoid the hot afternoons.  The rides from Bikes and Moore on Wednesday evenings were pretty warm and sweaty, but they were fun and the group is a very good one.

I’ve set goals of 2,500 miles and 100,000 feet of climbing for 2020.  That’s not a lot for some cyclists, but if I get there it will be my biggest year ever.

My ride data is recorded on a Garmin Fenix 3HR watch, and is uploaded to ridewithgps.com and to strava.com, as the challenge requires.

My friend Rob rode 1000 miles in June of 2019 for charity, and that is an incredible achievement.  Completing my challenge made me realize the level of committment and effort it took for him to reach that milestone.  I’m not at that level yet, but maybe next year?

Parker Gang 2021

Welcome to the 2021 Parker Gang Tour of Kentucky!

Update:  The photo gallery for the 2021 ride is ready.

Click on this link to take a look.

Guido and I have been working hard to put together a great week of riding and finding fun places in Kentucky to visit – with a lot of help from Ed.

The get-together is planned for Saturday, June 5th through Friday, June 11th.

Lodging:

We will be staying at the Quality Inn in Cadiz, Kentucky from June 5th to the 7th, checking out on the morning of June 8th.

Here is the reservation information for the Quality Inn in Cadiz, KY.  You will need to call the hotel directly and tell them your reservation is for the Parker Gang group.  Making a reservation online will not get you the special group rate.

Quality Inn Cadiz KY Information — (270) 522-3700

We will be staying at the Quality Inn in Bardstown, Kentucky from June 8th to the 10th, checking out on the morning of June 11th.

Here is the reservation information for the Quality Inn in Bardstown, KY. You will need to call the hotel directly and tell them your reservation is for the Parker Gang group. Making a reservation online will not get you the special group rate.

Quality Inn Bardstown KY Information — (502) 349-9400

Rides:

Sunday – Cadiz to Ft Donelson – https://ridewithgps.com/routes/33174087

Monday – Cadiz to Metropolis – https://ridewithgps.com/routes/33274880

Tuesday – Cadiz to Bardstown – https://ridewithgps.com/routes/33089755

Wednesday – Bardstown to Valley View – https://ridewithgps.com/routes/33092250

Thursday – Bardstown to Louisville Slugger Museum and Churchill Downs – https://ridewithgps.com/routes/33294566

Routes can be downloaded from these links for use with your gps.  We will have maps and driving directions ready if you prefer paper to electrons.

Alternative Rides:

For Thursday – after visiting the Louisville Slugger Museum and factory, head back to Bardstown for dinner.

Planned Stops:

Sunday, June 6th

Fort Donelson
Land Between the Lakes

Monday, June 7th

the picture wall in Paducah
National Quilt Museum in Paducah
lunch at Logan’s Roadhouse in Paducah
Superman Square in Metropolis, IL

Tuesday, June 8th

Corvette Museum in Bowling Green
lunch TBD

Wednesday, June 9th

Valley View Ferry in Nicholasville
Lunch TBD
Dinner in Bardstown TBD – announcement of the 2022 ride location

Thursday, June 10th

The Louisville Slugger Museum and factory in Louisville
Churchill Downs, home of the Kentucky Derby to watch some racing and have a nice dinner – but if you’d prefer to skip Churchill Downs, head back to Bardstown for dinner.

Friday, June 11th

Say goodbye to Kentucky and head for home, safely please – looking forward to the 2022 get-together

Planned dinners:

Saturday June 5th – dinner at Triplets BBQ, it’s a short walk from the hotel

Sunday, June 6th – dinner at Pagliai’s in Princeton

Monday, June 7th – YOYO (you’re on your own) – possibly a dinner ride to Casey Jones Distillery to sample some moonshine and eat there.  For a very nice meal, the Harper House restaurant is an easy walk from the hotel and is a great option.

Tuesday, June 8th – Bardstown ??

Wednesday, June 9th – Bardstown ??, announcement of the 2022 ride location

Thursday, June 10th – Churchill Downs and Bardstown ??

Postscript:

When y’all get back home, send me the photos you took.  I’ll make a slideshow out of them and post it here.


The Pinarello Build – all wrapped up

The Pinarello build is finished, for now.  Wrapping the bars was an interesting exercise.  The hoods did not want to roll back out of the way while taping like modern hoods do, and tearing the hoods would be a disaster.  NOS Campagnolo brake hoods are hard to find, and even more so in white.  They’re basically ubobtainium so care was essential.

I hit upon an easy way to lift the hood out of the way so that the tape could be properly placed underneath it.  I used a Park Tool plastic tire lever.  I put a little soap on the top (the part that would touch the hood) so that it would slide more easily.  I wrap from the bottom up, slid the lever under the edge of the hood, lifted it, and continued on.  The same on the top of the lever.  The tape is tucked where it should be and the hoods are undamaged.

I use silicone self-fusing tape to hold the free end of the wrap in place.  No gooey mess in the summer heat, no sliding around and loosening, just tight and goo-free.  I learned to cut a taper in the tape so that the ends aren’t too wide when the tape is stretched while wrapping the end of the bar tape.

I’ll get a couple of photos today if the rain holds off.  That’s it until I rebuild the wheels with new rims and spokes.  The front rim has an annoying “bump” near the rim seam that you notice while braking.  It’s not ideal, but it will be OK until I can get the wheels rebuilt.

Patience is a virtue, but one that I don’t have in abundance.  This build took a long time from when I bought the bike, but I think it’s turned out well.  And for you patient souls that followed along with this project, photos follow.

3rd Annual Bourbon and Tobacco Tour – Rescheduled!

RIDE RESCHEDULED for the weekend of September 12-13, 2020.

Good pavement, nice gravel, light vehicle traffic, courteous drivers, and the hills of western Kentucky in the springtime – what’s not to like? Well, your legs might complain about some of the gradients, but the descents make it all worthwhile. And the riding companions – unparalleled.

A few updates for the COVID mess:

Rather than meeting at my house for dinner, we’ll just pick up dinner in Cadiz and meet at the park on the west side of town to eat and tell biking lies.  My wife will be much happier with this, and there’s plenty of parking and tables for us.  Because I don’t know what will transpire between now and the ride, please bring a mask and put it in your jersey pocket.

There are plenty of places to pick up some food – pizza at Casey’s, mexican at El Bracera, Sonic, Wendy’s, Taco Bell, KFC, Triplets, Cracker Barrel, and Subway.  I’d rather have everyone at my house for a cookout, but I’m trying to make some adjustments that will work for everyone.  I appreciate your understanding.

Friday dinner, September 11:

For those folks coming into town on Friday, we’ll meet at Triplett’s BBQ in Cadiz for dinner. The restaurant is on US68/KY80 just west of I-24 at exit 65.

Saturday, September 12:

We will meet at 9:30am at the LBL Golden Pond Visitor Center on the Woodlands Trace Road, at the intersection of US-68/KY-80.  There is plenty of parking at the visitor center. I will have some repair/adjustment tools, grease, chain lube, floor pump, work stand, and some spare tubes and patches. Hopefully no major repairs will be needed before, during, or after the ride but we’ll be prepared for the usual (and some of the unexpected). We’ll roll out from the parking area around 10am.

There is no cost for these rides. If you want to chip in a little for the Saturday post-ride cookout, that would be appreciated, but it’s neither expected nor required.

The route:

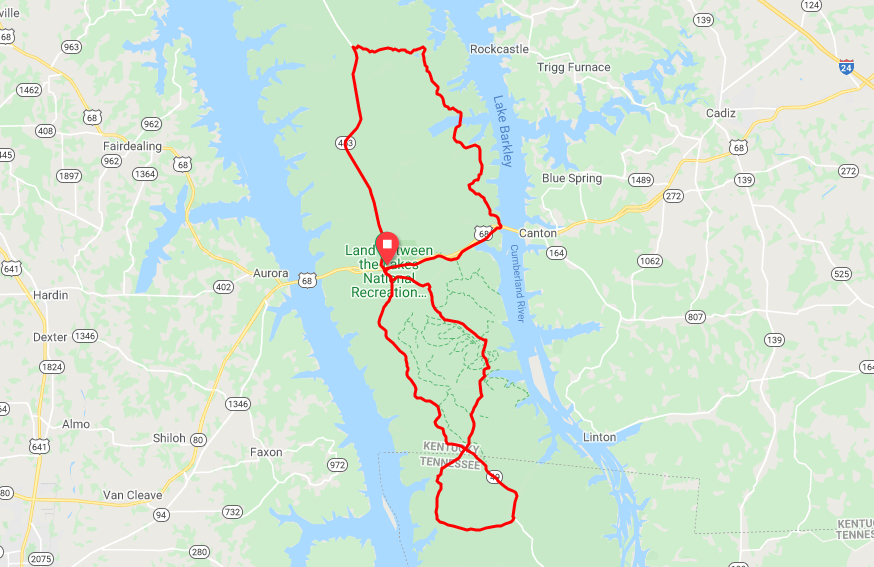
The route has been updated for 2020, and is entirely within the LBL. This loop starts and ends at the Golden Pond Visitor Center in LBL, and is about 56 miles, all paved, with about 3500 feet of climbing. There are a small number of actual turns in this route, so hopefully there won’t be any issues with navigation or getting lost. I will give my cell number to riders, should assistance be needed during the ride.  Cell coverage isn’t always the best in LBL, so bear that in mind.  This is an unsupported ride, but we will do our best to help everyone finish up safely.


Click to Download Cue Sheet for the full route

Click to Download Cue Sheet for the partial route

Other cool stuff to do:

If you want to come in a day early, or stay over for a day or two, you could follow the Kentucky Bourbon Trail.  If you like bourbon and want to sample the offerings by several distilleries, this is a great way to do it.  Check out where the distilleries are located and plan your route.

You can drive north on the Trace Road, and drive through the Elk and Bison Sanctuary.  There’s a small fee at the entrance to the sanctuary, and it’s well worth it.  I’ve been there more than once and it’s a unique opportunity to see herds of bison and elk moving around the area.  You do have to be in a vehicle – a bicycle vs a 2000 pound bison – no thanks.

There is a trap range close to the Lake Barkley Lodge, so if folks are interested we can shoot some clay targets.  No prizes, just bragging rights.  I have shotguns, ammunition, and clay targets – so all you’ll need is hearing and eye protection.  If you’ve not done this before, it’s challenging and fun. If you’re new to this, I’ll be happy to help you shoot safely.

Post-ride cookout:

See the COVID notes above for Saturday dinner plans.

Sunday, September 13 – ride the trails:

If folks are interested, we’ll take some fatter-tired bikes out for some trail riding on Sunday. There’s a lot to choose from, the map links below will give you an idea of the variety available to us.  A good choice is the Hardwoods Trail, from east to west all the way to Kentucky Lake.  Mostly crushed limestone and a lot of fun.  I would rate this trail as easy/moderate.  Bikes with road tires won’t be the best choice for this – wider tires are the best way to go.

A local friend and riding buddy will lead the gravel ride on Sunday, he knows the gravel routes in LBL much better than I do.

At the north end of the LBL, there is a good singletrack loop named the Canal Loop.  I would rate this loop as moderate/difficult.

There is a fairly new option, the trails in Livingston County, to the north of LBL.  I’ve ridden there a few times and it’s a lot of fun.  These trails are rated intermediate/difficult, so bring your “A” game. Be advised, you will want some tread on your tires for these trails.

We’ll figure out when and where to meet during the cookout and I’ll update the information here.

LBL Hike and Bike Trails

LBL Maps – click the Trails tab.

Livingston County MTB Trails

There are 500 miles of trails and 200 miles of roads in LBL. It is great to have this area so close to home. Not all of the trails are available for bicycling, so check the website while you scout a potential route.


Temperatures to expect:

The average high temperature in September is 83 degrees, and a low average temperature of 58 degrees, so pretty good riding weather.

Lodging:

Here are some options for lodging and some suggestions for restaurants in the area.

Kenlake State Resort Park Reservations

Lake Barkley Lodge reservations

Both are reasonably priced and are just a few minutes from our starting place. Kenlake and Lake Barkley both have restaurants too. For those folks arriving on Friday, we’ll meet for dinner.

Red Roof Inn – Cadiz

Quality Inn – Cadiz

Both of these hotels are at I-24 exit 65, and are within walking distance of Triplets.  Driving time to the start point is 20-30 minutes.

Bike Shop:

Bikes and Moore in Hopkinsville is a great shop that I’m happy to call “home”.   I couldn’t find a complaint if I tried. Good folks and they’ll be happy to help you out, should you need more than a tweak or two.  They have knowledgeable mechanics and a good parts inventory too.

Questions:

Contact me if you have any questions, I’ll do my best to help.

Please watch your speed while driving in LBL, it’s federal land, so speeding tickets are expensive – paraphrasing Agent K – “the rangers do not have a sense of humor they’re aware of.”

The Pinarello build – wrapping up

The maiden voyage with the newly finished Pinarello went fine, no major issues. The front brake lever slipped a little on the bars, but that’s an easy fix.

The harder fix is the stem. The original stem is a 3T, with Pinarello pantographed on both sides of the stem. It’s 70mm long and at least 40-50mm too short for a reasonable fit. I really don’t want to swap out the pantographed stem, but the fit isn’t good with it due to the short length. I picked up another 3T stem that is 110mm long and I think it will give me a much better fit – but I lose the pantographed stem in the swap. It really isn’t the trade I want to make, but if the bike isn’t comfortable to ride it will sit unridden – and the Pinarello deserves to be ridden and enjoyed.

The headset is better than my first assembly but it is still rough. It’s really noticeable when riding hands-off, and especially when riding hands-off and pedaling. It’s bad enough that it needs to be fixed so I bought a replacement.

<START OF RANT> Note to ebay sellers – you can’t say an item has been shipped when you print a shipping label. It’s shipped when you deliver it to the shipping company, whether that is USPS, UPS, FEDEX, or another shipper. I’ll be taking this up with the seller when I receive the headset, and the complete tracking history shows the sequence and timing of it all. <END OF RANT>

Once both parts are here, I’ll swap them both at the same time, and when it’s back together a short ride will confirm that everything is set up and working properly. Then I’ll wrap the bars and call this project done.

The Pinarello build, part 3 and a test ride

Installed the Cuissi Inox bottle cage (thanks, Rob), and the Campagnolo crank bolt covers.

Ground about 3mm off the seatpost binder bolt recessed nut, filed it smooth, and installed it.  Greased the seatpost and installed it.  Clamped the SA white saddle to the seatpost and sort-of aligned it.  Tightened the clamp bolts but it will need to be set to the right place once the bars are on.  The white saddle looks great with the blue frame and the white decals.

The bearings and the brake lever ferrules are supposed to be delivered on Saturday, they are the last parts I’m waiting for to finish the build.  Getting it ready for the maiden voyage should take a couple of hours.

The headset bearings were delivered a couple of days earlier than initial estimates.  Under-promise and over-deliver is alive and well – but no complaints.  I replaced the 5/32 bearings with 3/16 bearings, and quickly noticed that the lower race wasn’t in the correct place in the lower cup.  That meant that this headset uses 5/32 bearings, which is what I had.  After texting back and forth with a knowledgeable bike guy (thanks, Bob) I learned that 5/32 is in fact correct, and that I had not used the correct number of bearings.  I fixed that error and the headset is much better.

Installed and adjusted the stem and bars.  Pretty easy and quick once the headset was sorted out.

Next is the brake hoods.  I lucked onto a set of NOS Campagnolo white brake lever hoods a few months ago and picked them up, knowing I would use them on this build.  Installing the hoods was an exercise in frustration and anxiety, since older hoods are known to tear when stretched, and you must stretch them to get them onto the brake levers.  Another knowledgeable bike guy (thanks, Scott) suggested putting the hoods in very hot water, allowing them to become more pliable, and then sliding them onto the lever body.  It worked – no tears and they’re in place on the levers.  Slid the levers onto the bar, positioned them to what I think is the proper place, and tightened them down.

Ran the brake housing for the rear brake, left of the stem and up under the bars then down to the lever.  Checked lock to lock bar turns without any binding, and cut it length.  Installed the cable and clamped it in place.  Rear brake is braking.

Ran the brake housing for the front brake, make the housing loop the same height as the rear brake housing, cut it to length, installed the cable, clamped it in place, and we have front braking.

It’s ready for a test ride.  Rechecked the fasteners to be sure they’re tight, and rode down to the neighbor’s house and back.  There is a bump in the front rim that I noticed while braking – I might be able to repair that but if not, I was going to relace the hubs to new rims anyway.  I just might have to move that project up earlier on the calendar.

The levers seem to be correct, but I want to get some miles in before I decide that for sure.  Once that’s settled, I’ll wrap the bars and the Pinarello will be finished.  Thank you for following along with this project.